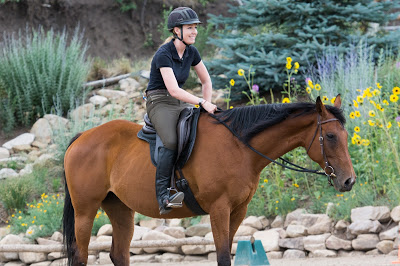
Horse Thresholds and Confidence (and how to score leadership points!)


Have you ever left the barn to take your horse out for a ride or to play with in a new place and 10 minutes later he's spooking, jigging, and prancing about? Or perhaps he gets slower and slower and eventually won't go forward, then when he does he explodes soon after?

What you're experiencing is your horse blowing by threshold after threshold until he can't manage to stay calm, confident, and connected to you. Not only does this cause him to give you zero points for leadership, it can also be a huge safety issue!

Think of a threshold as a line on the ground that your horse is not 100% sure he will survive if he steps over. It may start out as a slow decline in confidence, however the more lines you cross that your horse deems dangerous can quickly cause him to become unsafe, unwilling, and unmanageable.

Any Horsenality, confident or un-confident, can experience coming to a threshold. Often times it is only a moments hesitation for an extrovert before they blow by it because they can't stop their own feet. For an introvert it can be them slowing way down, holding their breath, or stopping and refusing to go forward.

Regardless of how your horse tells you he's come to a threshold, where he won't feel safe one step beyond this imaginary line, it is up to you to recognize and honor this for your horse.

Retreating a few steps back to where he has confidence and waiting for him to release his tension and fear before proceeding will prove to him you are a leader he can count on to keep him safe. It shows him that you'd never push him off the edge of the cliff he feels he has come to when he hits that threshold and can't go on.

By being aware of the first hesitation or tension you feel in your horse and addressing it at that moment you are helping extinguish a spark before it turns into a raging fire.

The sooner you notice the reaction, the less you have to do for your horse to feel confident.

Remember, as we seek relaxation while riding it is important to account for the horse's confidence every step of the way!


If you enjoy these blog posts don't forget to subscribe to my blog or like my facebook page to see more from me!

Parelli Zones of a Horse

Do you know what the Zones of a horse are?  They're different sections of a horse that will influence his movement either forward, backward, left, right, up, or down.

Zone 1

is the horse's nose, and everything in front of it for a mile.  Pat always says "nose, neck, maybe the feet".  The nose is usually the first part of the horse to touch an object or go under, over, or between something.  The first part of the Touch It pattern is helping the horse become confident putting his nose on something.  We direct the horse on our Circle Game by sending his nose (Zone 1).  We encourage horse horses to follow Zone 1 when we're riding.  Zone 1 is the first part of the horse that we use for direction and building confidence.

Zone 2

is from right behind his ears all the way down to the break of the withers, where your neck string would sit, is Zone 2.  Any pressure here will cause the horse to turn or back up.  Often times more dominant, confident (Left Brain) horses have trouble yielding Zone 2.

Zone 3

 starts at the break of the withers and encompasses the horse's front legs, shoulders, back and ribs, ending at the point of the hip.  Everything from your neck string all the way back to his flanks and hips is Zone 3.  Pressure in Zone 3 will cause the horse to go forward or sideways.  Building confidence in Zone 3 is important because this is the Zone you will be in when you're riding.  That is why we encourage playing a lot of driving games On Line in Zone 3 - it helps prepare the horse for a leader (you!) in that space of his body.

Zone 4

starts at the point of the hip and encompasses the hind legs, hips, and rump ending at the tail.  Pressure in Zone 4 usually sends the horse forward or yields the hindquarters.  Horses that lack confidence or are fearful of the human have a more difficult time yielding their hindquarters (Zone 4) because it causes them to cross their hind legs (a very compromised position for a prey animal that relies on flight for survival) and face the human with both eyes.  Having good control of Zone 4 is paramount for safety both on the ground and in the saddle.

Zone 5

is everything from the tail and behind it, for up to a mile in distance.  Pressure in Zone 5 sends the horse forward.  A presence in Zone 5 can generate curiosity and cause the horse to turn and investigate if they do not feel threatened.  Building confidence in Zone 5 is also important for safety both on the ground and while riding, and often helps horses that have bucking issues.  

Remember when you're in Zone 5 to be aware of the Kick Zone and always stay safe!  Your Carrot Stick is 4 feet long and is a good indicator of a safe distance to stand when in Zone 5. 

Delicate Zone

is everything between the nose band of the halter, the eye area, up over the ears, ending where the halter sits right behind the ears.  This is a sensitive and delicate area and should be treated with care, you should not use your Carrot Stick in this area.

Helping your horse develop confidence in each Zone not only improves overall safety and control, it will help bring your communication to new heights and cause your horse to have more comfort and enjoyment during his outings with you.

Did you know you can play the Seven Games in ALL 5 Zones?  It's a great way to build your creativity and your horse's puzzle solving skills in each Zone!

Need ideas or support for how you can play with your horse in different Zones?  Click HERE to sign up for the Savvy Club and get access to thousands of horse training videos and articles, access to Pat and Linda, support, ideas, interactive task lists, and all the back issues of the Parelli Savvy Times and Savvy Club DVDs!